Hey Friends,
This Post is all about deploying your Dynamics NAV through ClickOnce to your local domain, where each User can access NAV without any dependency of system prerequisites. If you have no idea of ClickOnce then you can have a look on this ClickOnce
So first step what you need to do is to install the ClickOnce from the NAV build. If you have NAV already installed then you just need to open it out and install the ClickOnce setup.
Once you are done with the installation part you need to make a new folder and subfolders in any of your drives and name it like this FileShare\ClickOnce\Deployment\ApplicationFiles(Name you can choose as per you).
Now you need to navigate to C:\Program Files (x86)\Microsoft Dynamics NAV\71\RoleTailored Client.
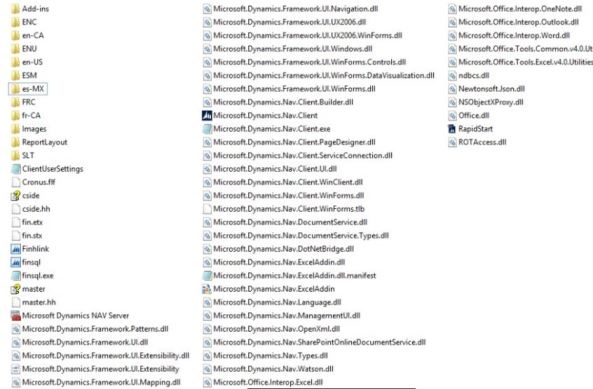
Here from this folder you need to copy all the files from the above mentioned path to – FileShare\ClickOnce\Deployment\ApplicationFiles the one we made above.
After this you need to copy your ConfigSettings from your local app folder(C:\Users\username\AppData\Roaming\Microsoft\Microsoft Dynamics NAV\71)
Now you need to navigate to – C:\Program Files (x86)\Microsoft Dynamics NAV\71\ClickOnce Installer Tools\TemplateFiles and copy all Files from here to this directory as created above FileShare\ClickOnce\
Now you need to open Command Prompt with admin right and fire the command as shown below –
- Navigate to FileShare\ClickOnce\Deployment\ApplicationFiles from command prompt and fire this command
- “C:\Program Files (x86)\Microsoft SDKs\Windows\v8.0A\bin\NETFX 4.0 Tools\mage.exe” -Update Microsoft.Dynamics.Nav.Client.exe.manifest
- Navigate to FileShare\ClickOnce\Deployment\ from command prompt and fire this command
- “C:\Program Files (x86)\Microsoft SDKs\Windows\v8.0A\bin\NETFX 4.0 Tools\mage.exe” -Update Microsoft.Dynamics.Nav.Client.application -appmanifest ApplicationFiles\Microsoft.Dynamics.Nav.Client.exe.manifest -appcodebase \\fileshare\Clickonce\Deployment\ApplicationFiles\Microsoft.Dynamics.Nav.Client.exe.manifest
- You can manually navigate to these two files and cross-verify with current date and time that it’s been successfully updated.
- Now you need to open Microsoft.Dynamics.Nav.Client.application file from Deployment folder as created above and change couple of things like Assembly Identity name as your specific Customer for whom you made this OneClick.
Now you are good to go but again one point is there that you need to take care – You can only access this OneClick from your local computer if you have shared this over network otherwise if you try to access it directly then you will end up with some security zones issue.
So now share your Fileshare folder with all necessary permissions and for those people with whom you truly want to share. Once you are done with this, Please try to access this in your windows explorer
\\ComputerIP\FileShare\ClickOnce\Deployment\
Now try to open your Microsoft.Dynamics.Nav.Client application manifest, a dialogue box will come which will ask you to install it up, if it ends up with an error then you need to open the log and check the error log.
Install the application and enter the valid ID and Password and you will be logged in to NAV RTC Environment.
CHEERS..


Pingback: NAV ClickOnce Deployment – Fileshare - Dynamics NAV by RockWithNAV - Dynamics NAV Users - DUG
Pingback: NAV ClickOnce Deployment – Fileshare - Microsoft Dynamics NAV Community